Step by Step Guide:
To make the bauble:
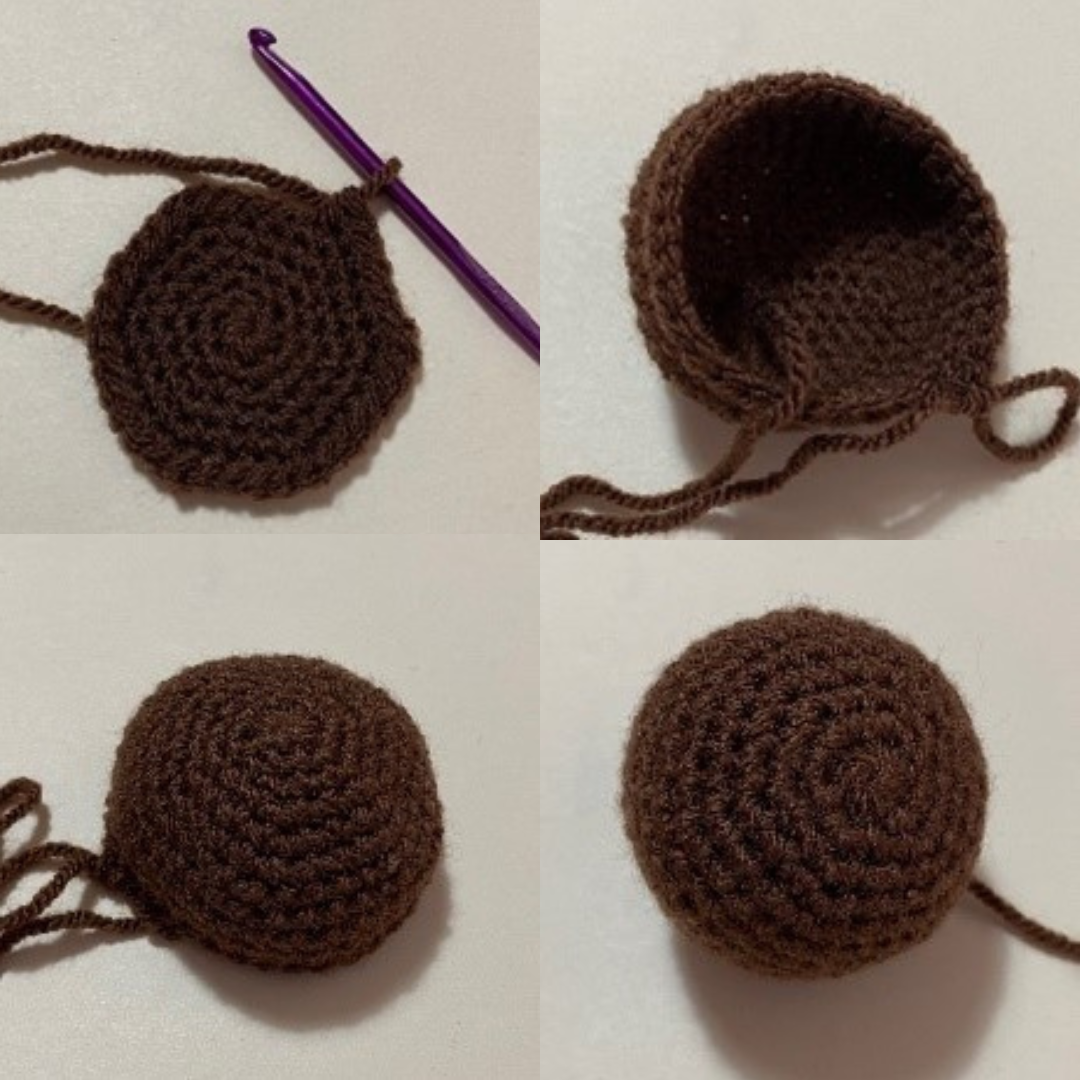
Make using chocolate brown yarn.
|
Round
|
Pattern
|
Stitches
|
Yarn Colour
|
|
1
|
6DC in MR
|
6
|
CB
|
|
2
|
6INC
|
12
|
CB
|
|
3
|
(1DC, INC) x 6
|
18
|
CB
|
|
4
|
(2DC, INC) x 6
|
24
|
CB
|
|
5
|
(3DC, INC) x 6
|
30
|
CB
|
|
6
|
(4DC, INC) x 6
|
36
|
CB
|
|
7-12
|
36DC
|
36
|
CB
|
|
13
|
(4DC, DEC) x6
|
30
|
CB
|
|
14
|
(3DC, DEC) x 6
|
24
|
CB
|
|
15
|
(2DC, DEC) x 6
Begin stuffing
|
18
|
CB
|
|
16
|
(1DC, DEC) x 6
|
12
|
CB
|
|
17
|
6DEC
|
6
|
CB
|
Finish stuffing. SS to the next st, cut yarn with a long tail. Pull yarn through the loop and pull to tighten. Use a needle and yarn tail to close the hole further if needed. Leave a long tail attached.
To make the muzzle:
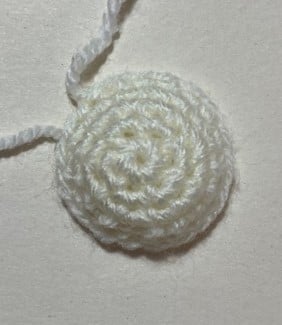
Make using cream yarn.
|
Round
|
Pattern
|
Stitches
|
Yarn Colour
|
|
1
|
6DC in MR
|
6
|
Cr
|
|
2
|
6INC
|
12
|
Cr
|
|
3
|
(1DC, INC) x 6
|
18
|
Cr
|
SS to the next st, cut yarn with a long tail for sewing to the bauble. CH1. Pull yarn through the loop and pull to tighten.
To make the antlers:
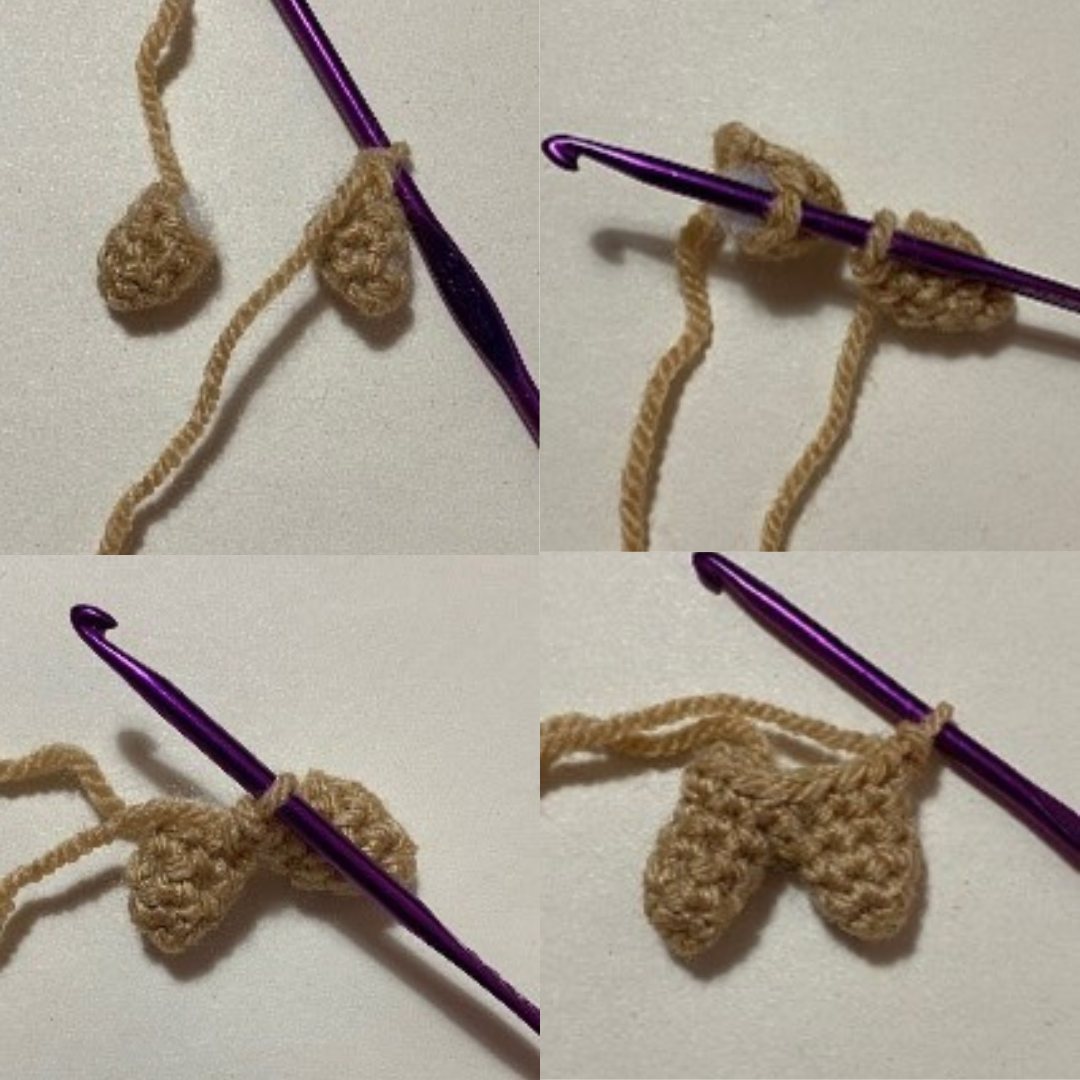
Make two using latte yarn.
|
Round
|
Pattern
|
Stitches
|
Yarn Colour
|
|
1
|
3DC in MR
|
3
|
L
|
|
2
|
3INC
|
6
|
L
|
|
3-4
|
6DC
|
6
|
L
|
SS to the next st, cut yarn. Pull the yarn through the loop, pull gently to fasten.
Make a second piece the same as the above, but do not cut the yarn or fasten off.
With the second part still on the crochet hook, take the first part and put the hook through the next st after. Join with 1DC. Continue this round with 5 more DC around the first part, and then 6DC around the second part. You should have 12DC at the end of this joining round.
Continue as follows:
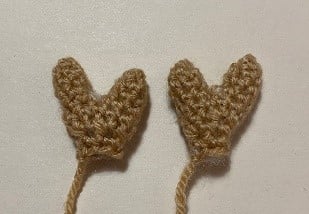
|
Round
|
Pattern
|
Stitches
|
Yarn Colour
|
|
1
|
12DC
|
12
|
L
|
|
2
|
6DEC
|
6
|
L
|
|
3-4
|
6DC
|
6
|
L
|
SS to the next st. Cut the yarn with along tail for sewing to the bauble. CH1. Pull the yarn through the loop and pull to tighten. Stuff the piece.
To make the ears:
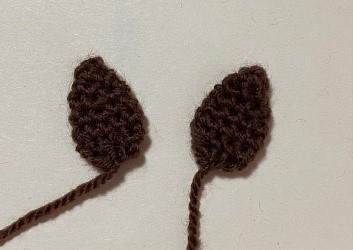
Make two using chocolate brown yarn.
|
Round
|
Pattern
|
Stitches
|
Yarn Colour
|
|
1
|
4DC in MR
|
4
|
CB
|
|
2
|
(1DC, INC) x 2
|
6
|
CB
|
|
3
|
(2DC, INC) x 2
|
8
|
CB
|
|
4
|
(3DC, INC) x 2
|
10
|
CB
|
|
5
|
10DC
|
10
|
CB
|
|
6
|
(3DC, DEC) x 2
|
8
|
CB
|
|
7
|
(2DC, DEC) x 2
|
6
|
CB
|
SS to the next st. Cut the yarn with a long tail for sewing to the bauble. CH1. Pull the yarn through the loop and pull to tighten.
To make the nose:
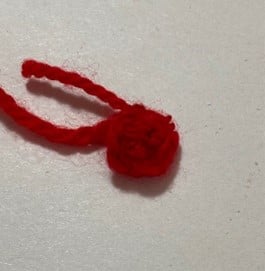
The nose is made with red yarn.
|
Round
|
Pattern
|
Stitches
|
Yarn Colour
|
|
1
|
3DC in MR
|
3
|
R
|
|
2
|
3INC
|
6
|
R
|
SS to the next st. Cut the yarn with a long tail for sewing to the muzzle. CH1. Pull the yarn through the loop and pull to tighten.
Assembly
Attaching the nose to the muzzle:
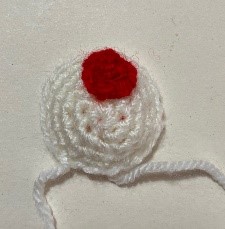
Using the needle and the yarn tail from the nose, sew the nose to the muzzle in the desired position. Thread yarn ends to back of the muzzle.
Attaching the muzzle:
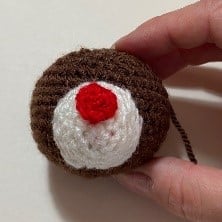
Using the needle and the yarn tail from the muzzle, sew the muzzle to the bauble in the desired position. Tuck yarn ends under the muzzle as you go. Once finished, use the needle to pass the yarn through the bauble to fasten, and snip off excess.
Attaching the ears:
Using the needle and yarn tail from the ear, sew ear onto bauble into desired position. When finished, using a needle, pass the yarn through the bauble to fasten, and snip off excess. Repeat with second ear.
Attaching the antlers:
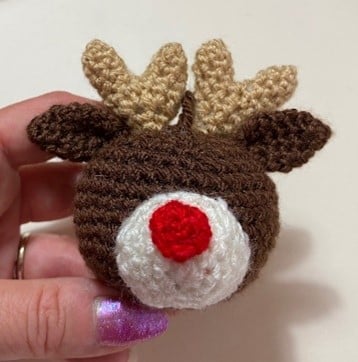
Using the needle and yarn tail from the antler, sew antler onto bauble into desired position. When finished, use the needle to pass the yarn through the bauble to fasten, and snip off excess. Repeat with the second antler.
To make the eyes:
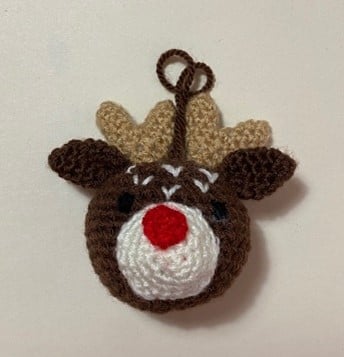
Using black yarn, and needle, thread the yarn through the back of the bauble to the position of the first eye. Hold the needle next to the place the yarn has come through. Wrap the yarn around the needle4 times. Insert the needle back through the bauble next to the entry point. Holding the wrap, slowly pull the yarn back through, A little knot should be formed. Pull yarn through, head and snip off excess yarn. Repeat this with the other eye.
Alternatively, thread the yarn through the back of the bauble to the position of the first eye and then sew over the height of one crochet stitch 3-4 times, taking yarn back through, bauble when finished and repeating for the second eye.
To make markings on forehead:
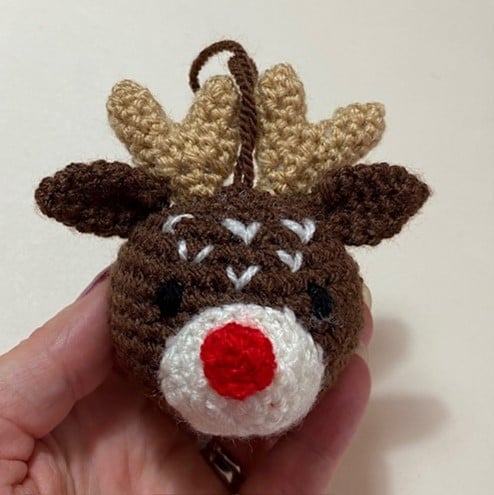
Using Cream yarn (Cr), thread the yarn through the back of the bauble to the position of the first set of markings and make little v shaped stitches as desired. Once finished, pass yarn back through bauble to fasten and snip off excess yarn.
Happy Crocheting!
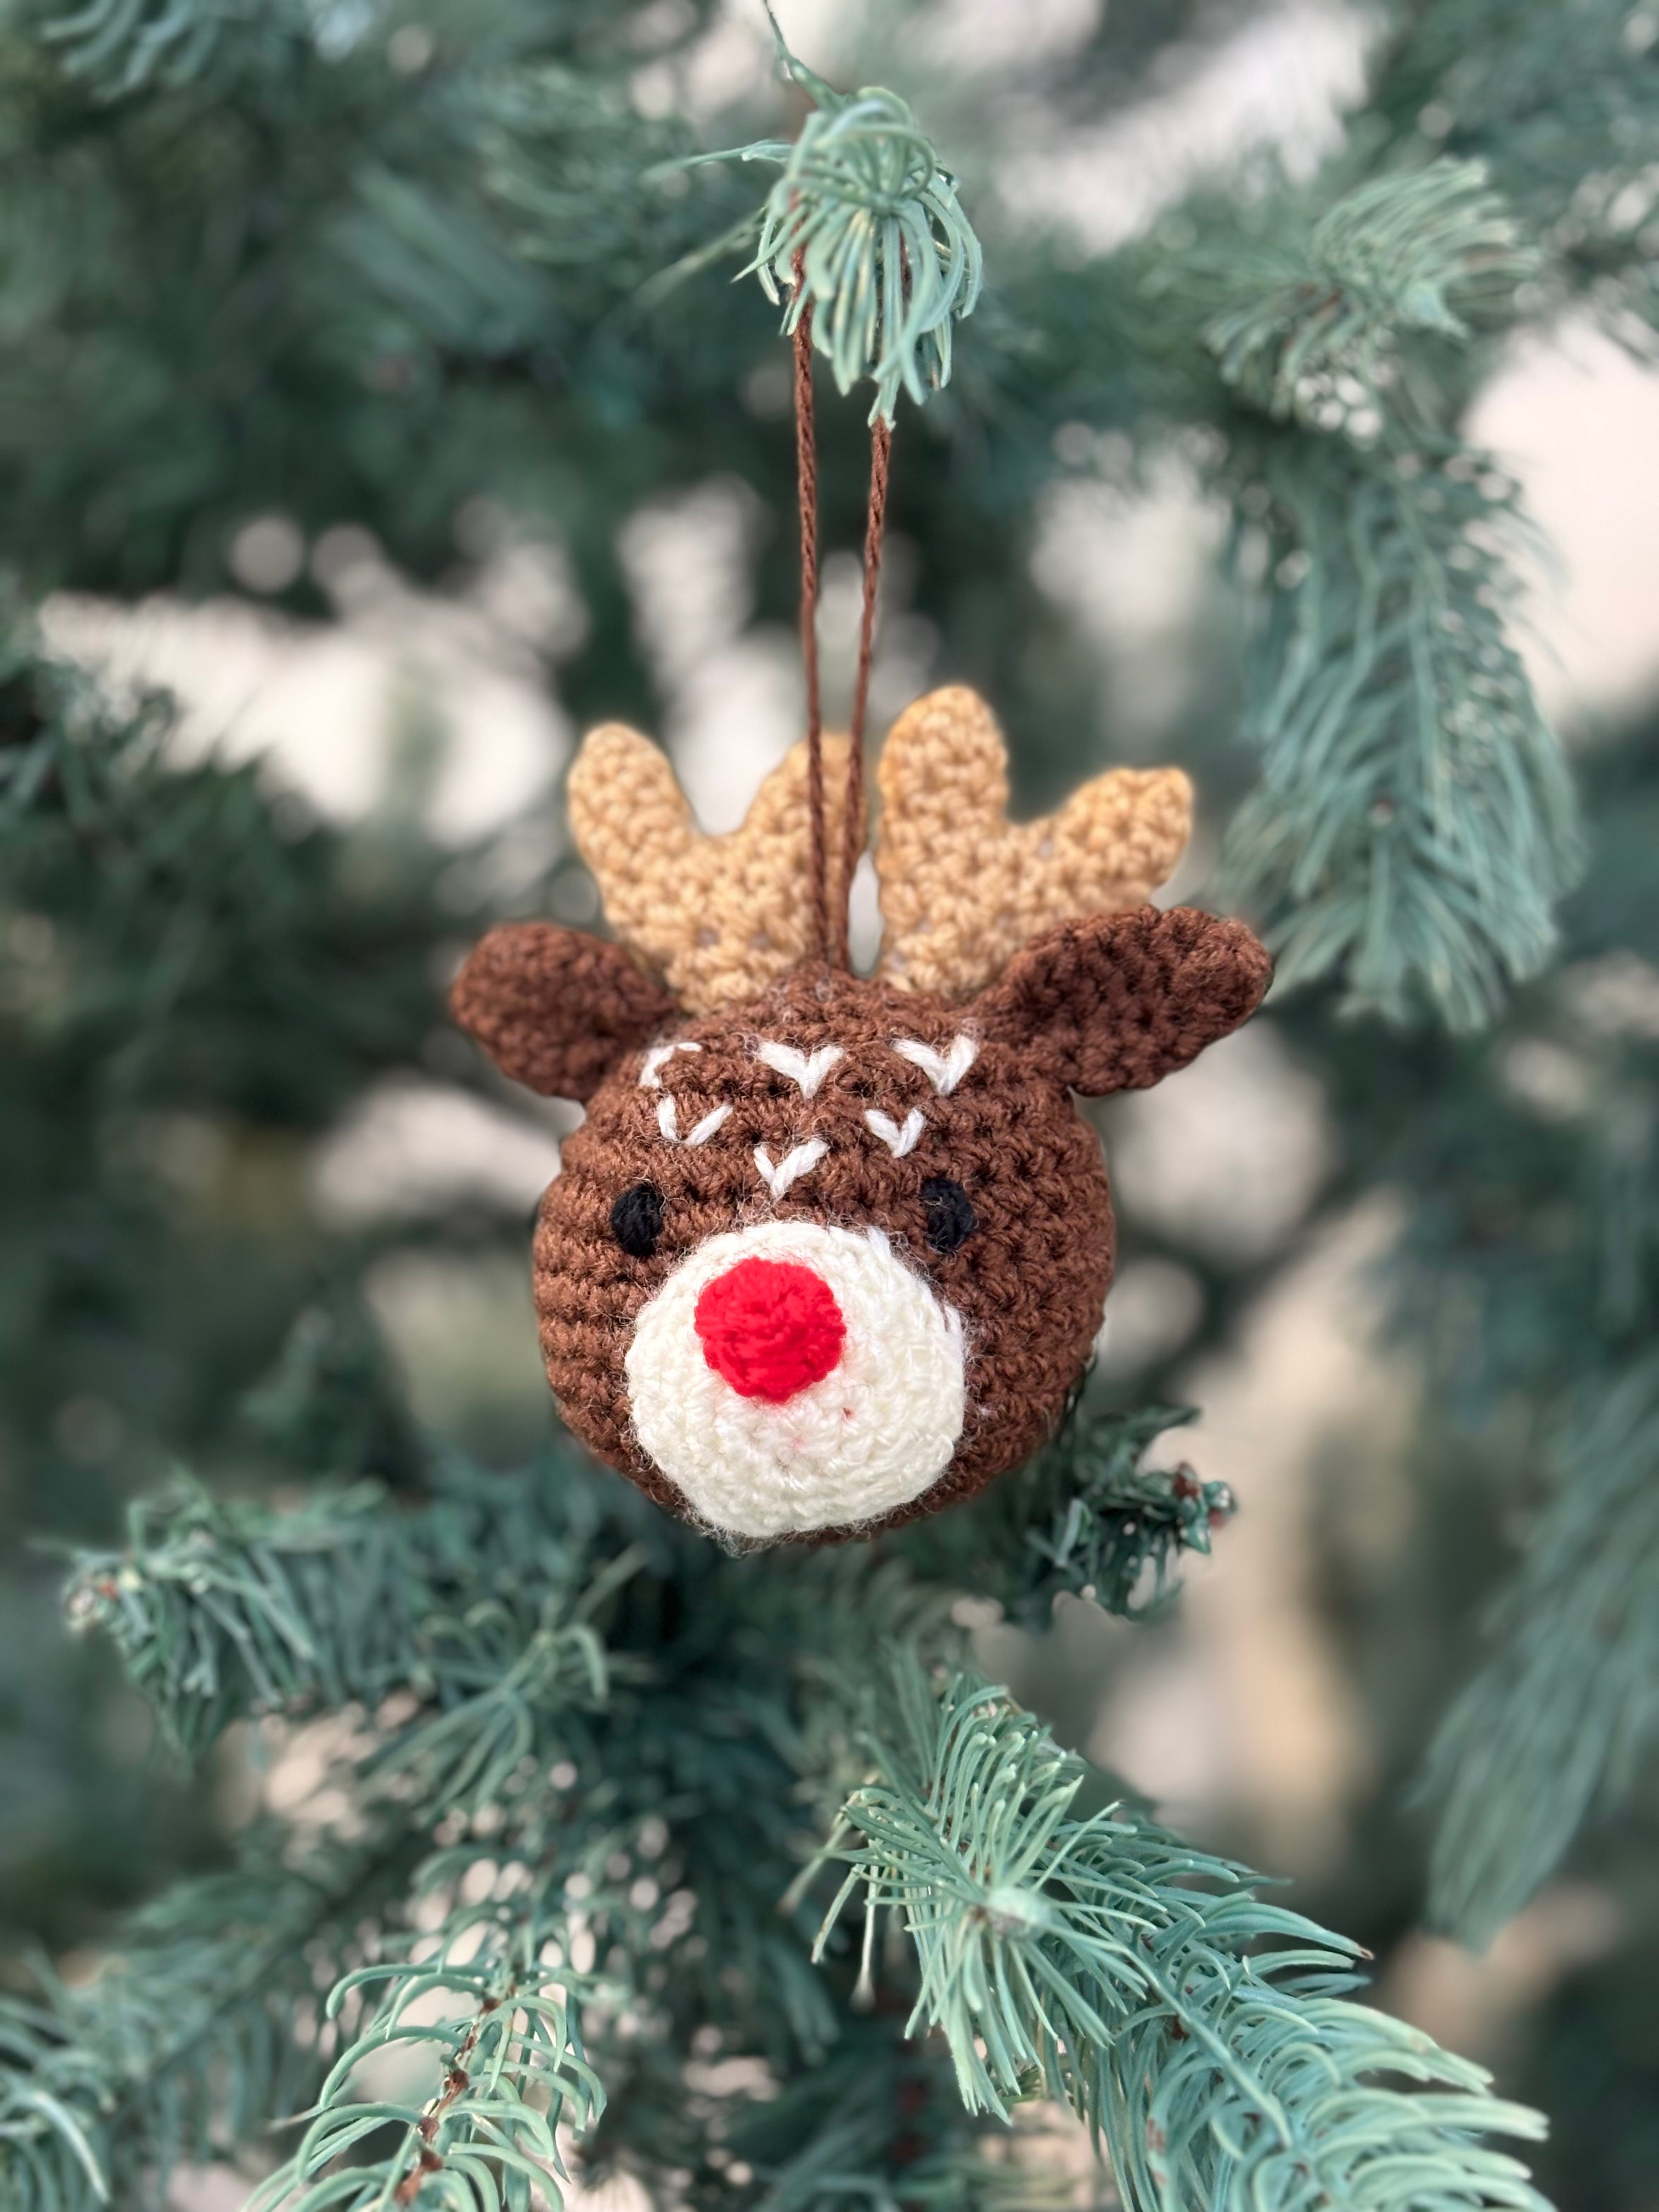
If you follow these steps, you'll have an adorable reindeer bauble ready to add a cosy, homemade touch to your holiday decor. Whether you're making it for yourself, as a gift, or even as part of a crochet ornament collection, this little reindeer is sure to bring joy and festive cheer to anyone who sees it.
For more crochet tutorials and inspiration, be sure to check out our free amigurumi paterns, and be sure to share your finished creations with fellow crafters. Happy crocheting!
