How to make your own clay photo frame—step by step!
Step 1: Roll out your clay and cut out the frame shape
Start by rolling out your clay on a clean, flat surface. Aim for an even thickness of about ¼ inch to ensure durability without being too heavy.
Place your photo on the clay to determine the size of the frame. Use a craft knife to cut out four rectangles (or any shape you like) slightly larger than your photo. Mould your pieces together to create the frame.

Step 2: Add texture and embellishments
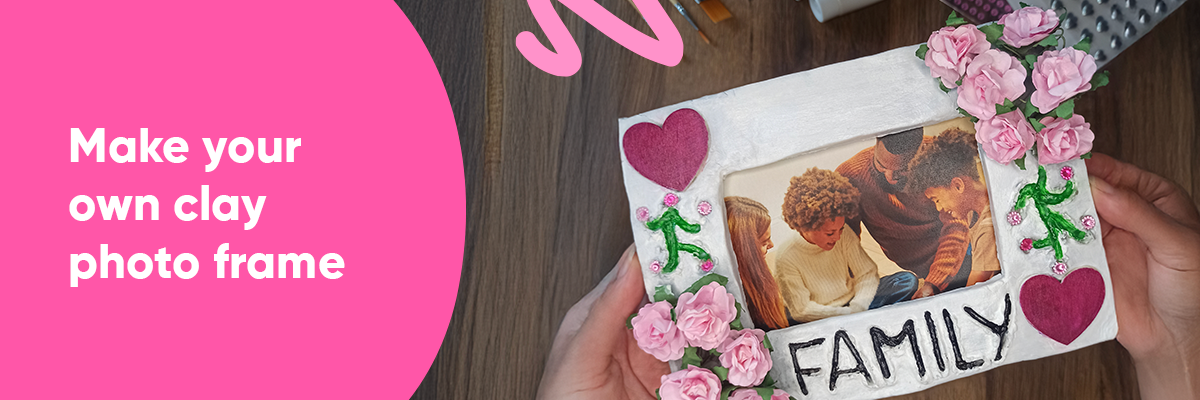
Before the clay dries, you can press in embellishments like beads, gems, or flowers to create a unique design. You can also use the thin end of a paintbrush to carve out any words or patterns in the clay. Once you’re happy with your design, leave the clay until it is fully dry. We recommend a cool, dry area with even air circulation to prevent cracking.

Step 3: Paint and decorate
Once the clay is dry, it’s time to decorate! Use your acrylic paints to add colour and bring your frame to life. You can go for a bright and bold design, or something a little more subtle to match your aesthetic – the choice is yours! You may need a few coats depending on the colour of your clay, and make sure your paint has fully dried before moving onto the next step.

Step 4: Seal your design to make it last
To protect your design, we recommend adding a layer of Mod Podge. This will help to secure any embellishments and lock in your paint to give your frame a glossy finish. Allow this to dry completely.

Step 5: Attach your photo and display
Once everything is completely dry, attach your photo to the back of the frame with glue or double-sided tape, and it’s ready to display! Hang it up in your home for an occasional glance at those happy memories or gift your clay keepsake to someone special.

Happy crafting!
Making a clay photo frame is more than just a craft—it’s time well spent. From shaping the clay to adding personal touches, every step allows you to engage in a hands-on, meaningful activity. The end result is a beautiful, handmade frame that holds more than just a picture—it holds a memory and the joy and care you put into making it.