The beauty of crafting is that you don’t have to break the bank to enjoy it. Sometimes cheaper is better, especially when times are tight, and you’re looking for quick and fun things to keep the kids entertained.
We’ve pulled together 5 easy craft ideas for under five pounds. That’s right - just 5 pounds! What’s even better, is that these inexpensive ideas involve reusing items you already have at home.
Our 5 craft ideas are great for the whole family to get involved in, and all the items you’ll be crafting will come in handy.
Let’s get crafting on a budget!
Budget-friendly craft ideas under £5
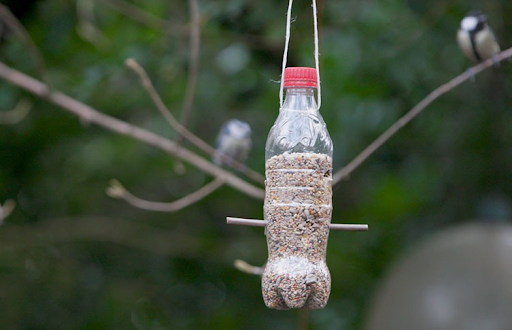
1. Bottle Bird Feeder

Turn your little ones into a mini David Attenborough by making a Bottle Bird Feeder for them.
We love this craft because it ticks all the boxes. It’s educational and allows you to teach them about what birds eat. It’s a craft that’s under £5 and uses things that you’ll have lying around the house. It has a positive impact on nature, bringing loads of pretty birds into your garden for your kids to look at.
Equipment & materials:
- -Plastic bottle
- - Two sticks
- - A pin
- - Scissors
- - String
How to make it:
- 1. Firstly, remove the cap from the bottle
- 2. Use the pin to puncture a few drainage holes in the base.
- 3. Make two level holes on the opposite sides of the bottle.
- 4. Use your scissors to widen these holes slightly.
- 5. Puncture a second set of feeding holes. Repeat steps to 2 to 4 further up the sides of the bottle and often by 90 degrees.
- 6. Pierce two holes in the neck of the bottle and widen these with scissors.
- 7. Thread the string through these holes.
- 8. Finally, fill the bottle with bird feed, and now you’re ready to hang it up!
Find the full step-by-step guide here!
2. Mini Pocket Notebook
Credit: https://happydealhappyday.com/upcycled-cereal-box-notebook/
Who wants to spend countless hours searching the high street for the perfect notebook, only to settle for some boring old design when you can create your own?
This cheap craft is super easy and fun to do, needing some household items, some bits of craft and plenty of paper. And although we wouldn’t recommend it for the office, it’s can be a fun a useful thing for you and your children to scribble on.
Equipment & materials:
- - Cereal box
- - 8x11 paper for the inside pages
- - Decorative craft tape or duct tape
- - Needle and thread
- - Decorative button
How to make it:
- 1. First things first, cut out the flat side of your cereal box
- 2. Then cut your paper down to fit the width of the cereal box
- 3. Fold both the cardboard and paper in half and place the paper inside the cover
- 4. Push your needle through the paper and card at the centre, top and bottom
- 5. Grab your thread and stitch the top of the notebook first, then the centre and bottom, and then tie off.
- 6. Cover your binding with your decorative tape and trim the ends, so it’s even with the edge of the notebook.
- 7. Now it’s time to create a button closure for your notebook.
- 8. Create a hole at the centre edge of your notebook
- 9. Sew through the hole a couple of times, but don’t cut the string
- 10. Use the rest of the thread to wrap around the notebook and twist around the button.
- 11. Lastly, cut the leftover thread, and your notebook is done!
Find the full step by step guide here!
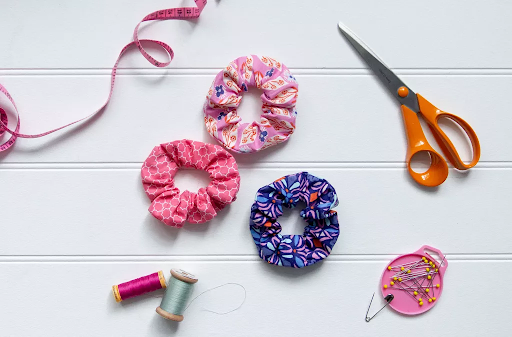
3. Hair Scrunchies

You can never have enough hair scrunchies. Even when you think you do, you go and lose one down the back of the couch or when you’re out and about and before you know it you’re scuttling around the house looking for one.
So why not have a ready-made batch that you’ve made yourself?
These scrunchies don’t require much time or materials to make. They’re just a bit of scrap fabric, some straight stitching and a little time and patience. In fact, they’re so cheap and easy to create, you could have one to match every outfit.
Equipment & materials:
- - A long piece of fabric scrap (larger than 24 inches long and 3.5 inches wide)
- - ⅜ inch elastic
- - Needle and thread
How to make it:
- 1. You’ll first need to cut a fabric strip to measure 24 inches long and 3.5 inches wide.
- 2. Then cut your elastic to 9 inches long
- 3. Fold one of the shorter edges of the fabric by ⅜ inch towards the wrong side and press down firmly to make it stay in place.
- 4. Fold the fabric lengthwise, making sure the edges are aligned together
- 5. Sew the fabric strip shut, ⅜ inch away from the edge using a backstitch.
- 6. Place a safety pin at the end of the tube and then insert the pin into the tube until the whole of the right side is turned out.
- 7. Thread your elastic through the fabric tube using a safety pin, scrunching the tube during the process.
- 8. To finish, secure the scrunchie by tying the ends of the elastic together, then tuck the edge of the scrunchie into the folded edge, and you’re done!
Find the full step-by-step guide here!
4. Paper Flower Bouquet
Paper flowers are not only a beautiful way to decorate your home, but they also make an affordable gift for someone special. I mean, who doesn’t love flowers, right? These flowers only require basic materials that cost less than five pounds, and you’ll probably have most of the equipment at home.
Equipment & materials:
- - Coloured paper
- - Floral wire
- - Glue
- - Scissors
- - Markers and/or crayons
How to make it:
- 1. Your first step is to cut out 3-5 even-sized squares from your paper for each flower.
- 2. Now you’ve cut your squares, fold them down the middle diagonally leaving a firm crease in the centre.
- 3. Next, fold up the edges of the paper towards the middle, then fold up the centre edges to reach the top corner. Pull these edges up and fold over until the paper looks like a diamond base with two triangular halves folded over.
- 4. Fold the open edges at the centre of your diamond outwards to meet the outer edges of the triangles. If it looks like the shape of half a kite, you’re on the right path!
- 5. Turn the petal around on itself to form a cone shape, then add a pea-sized dab of glue in between the folds to stick them together.
- 6. Glue your 3-5 petals to a flower stem.
- 7. Repeat the process until you're happy with the size of your beautiful bouquet, and they’re now ready to be displayed in a vase.
Find the full step-by-step guide here!
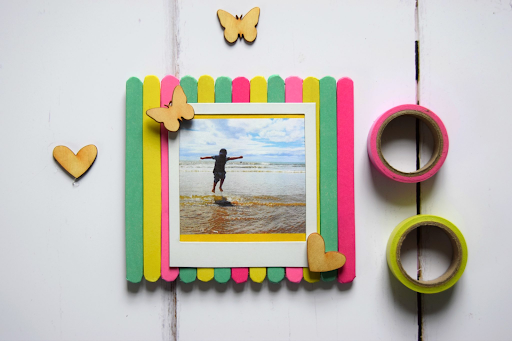
5. Craft Stick Photo Frame

Photo frames are a fantastic way to show off your favourite pictures and bring good memories back to life. But buying photo frames from the shops can get expensive if you need more than one.
The answer… Make your own!
This craft is super simple, and you don’t need any more than some craft sticks, washi tape, glue, decorations and a photo. Then with a bit of elbow grease and imagination, you can turn out a colourful and quirky picture frame on the cheap.
Equipment & materials:
- - Assorted washi tape
- - Craft sticks
- - Scissors
- - Glue
- - Decorations
- - Photo
How to make it:
- 1. To get started, cover all your craft sticks with washi tape.
- 2. Next, glue the craft sticks together by securing 4 extra sticks to the back in the opposite direction (2 at the top and 2 at the bottom).
- 3. You can now stick your photo firmly to the craft sticks. To add more colour and strength to the photo, use a photo inside a cardboard frame.
- 4. And it’s as simple as that! You have one finished washi tape frame.
Find the full step-by-step guide here!
Have fun crafting!
So these are our 5 cheap crafts for under 5 pounds. Within this list, we’ve got crafts that can be enjoyed alone or with the whole family. They are also super simple to make, which makes them perfect for beginners who are looking to improve their craft skills this year.


